 US Dollars
 Canadian Dollar
 Euro
Euro
 UK
UK
 Icelandic Króna
 Russian Ruble
 Swedish Krona
 South African Rand

 For a Printer Friendly Version, Click Here.
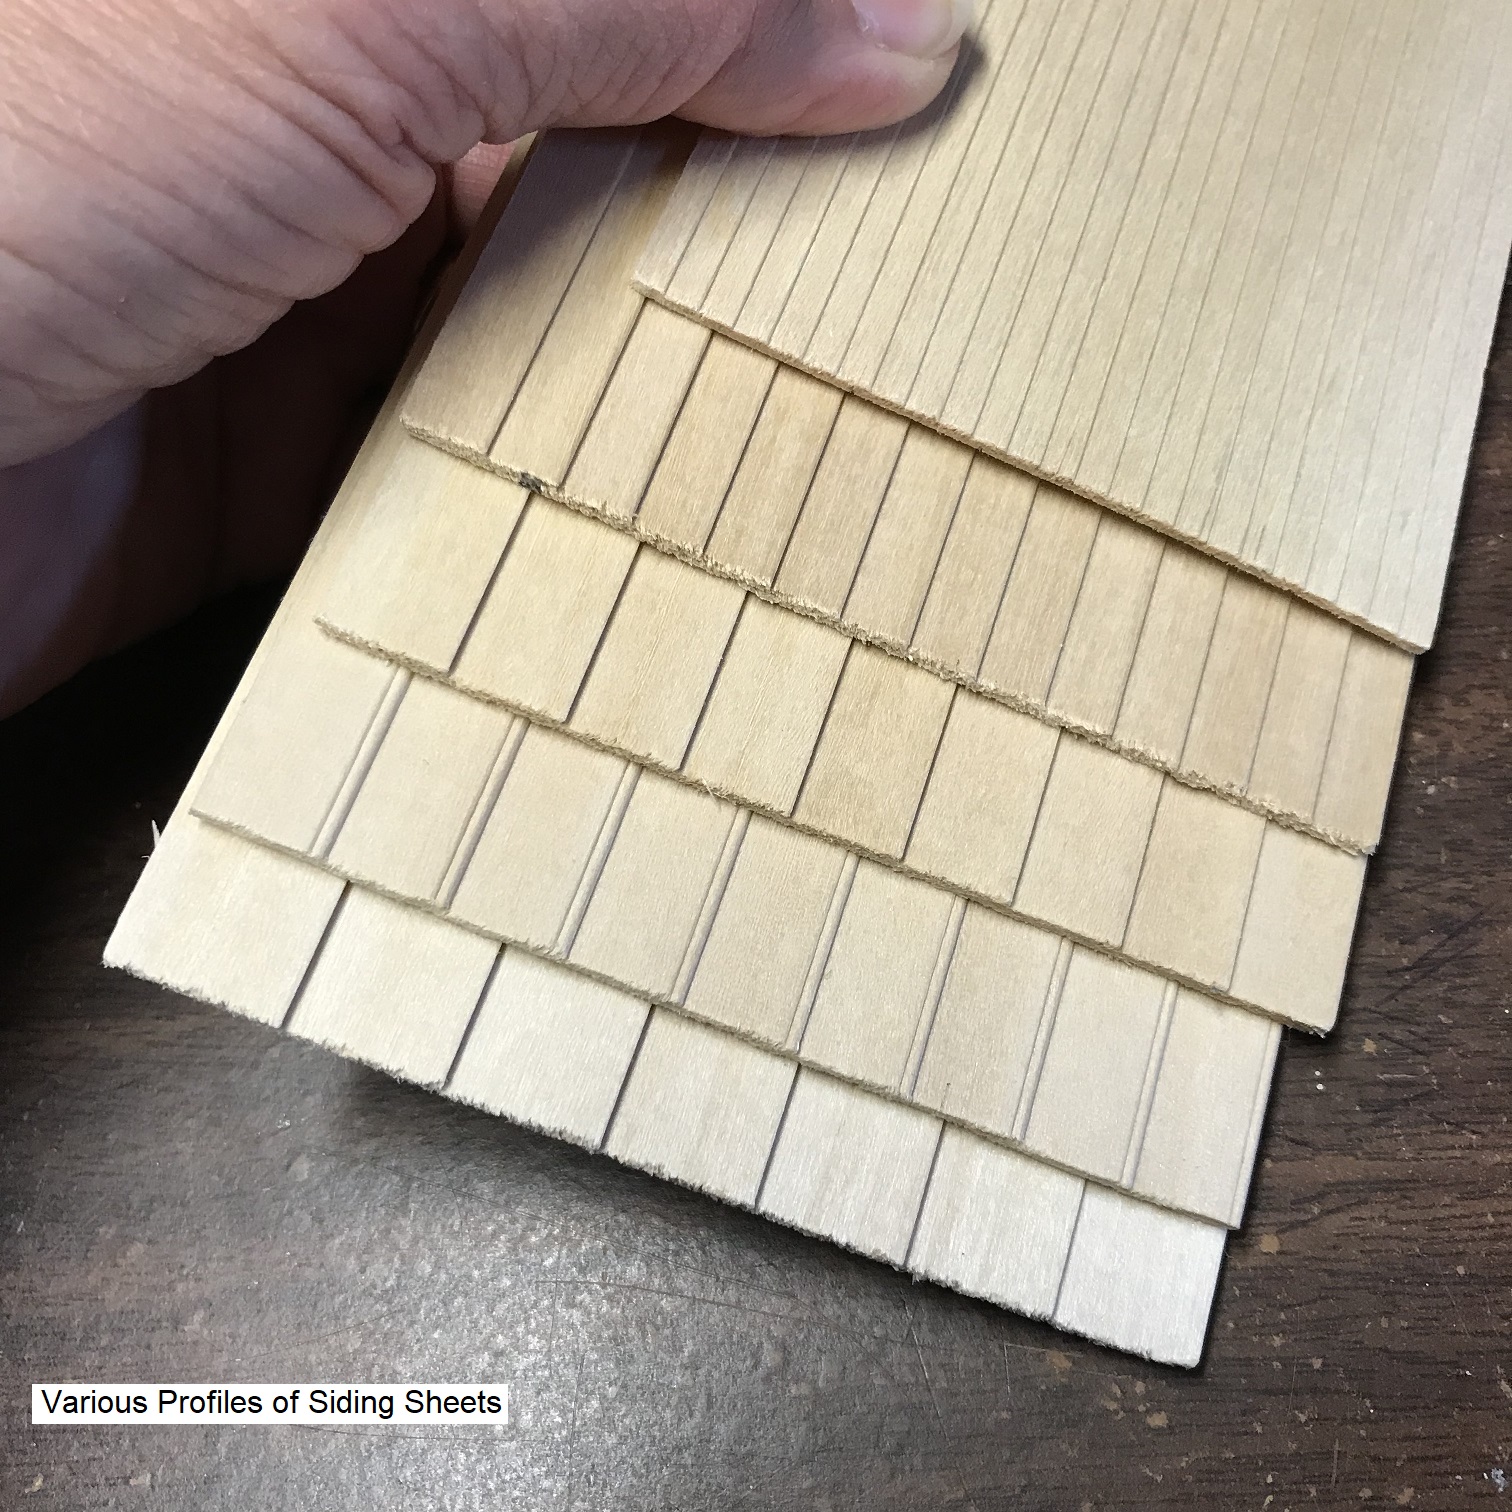
While some dollhouse kits include pre-milled siding, most scratch built and various other kits do not. Dollhouses built from scratch or kits using smooth cabinet grade plywood or luan plywood provide the builder with various options to finish the exterior walls according to their preference. One of the most common and favorite finishing option includes pre-milled siding sheets. Siding sheets typically measure approximately 3-1/2" high by 24" wide by 1/16" thick with some available in 3" heights and 12" or 36" length options. The siding sheets come in a variety of profiles including 1/2" lapped, 1/2" and 3/8" beaded, 3/8" lapped, 1/4" lapped, 3/16" lapped, and 1/8" lapped. The term "lapped" refers to the spacing of each course (or board width) on the siding sheet.
In one-inch (1:12) scale, the lap measurement for a 1/2" board width is equivalent to a 6" full size board and is a frequent size selected. Alternatively, a 3/8" board width (4-1/2" full size) is very typical of many older houses while a 1/4" board width can be authentic for one-inch scale houses. However, the 1/4" width is more commonly used on 1/2" (1:24) scale houses. A board width of 1/8" is best suited for 1/4" scale houses and makes a nice shutter slat material in one-inch scale. A 3/16" board width is also available and is generally used on half-inch (1:24) scale houses or for a wider shutter in one-inch (1:12) scale.
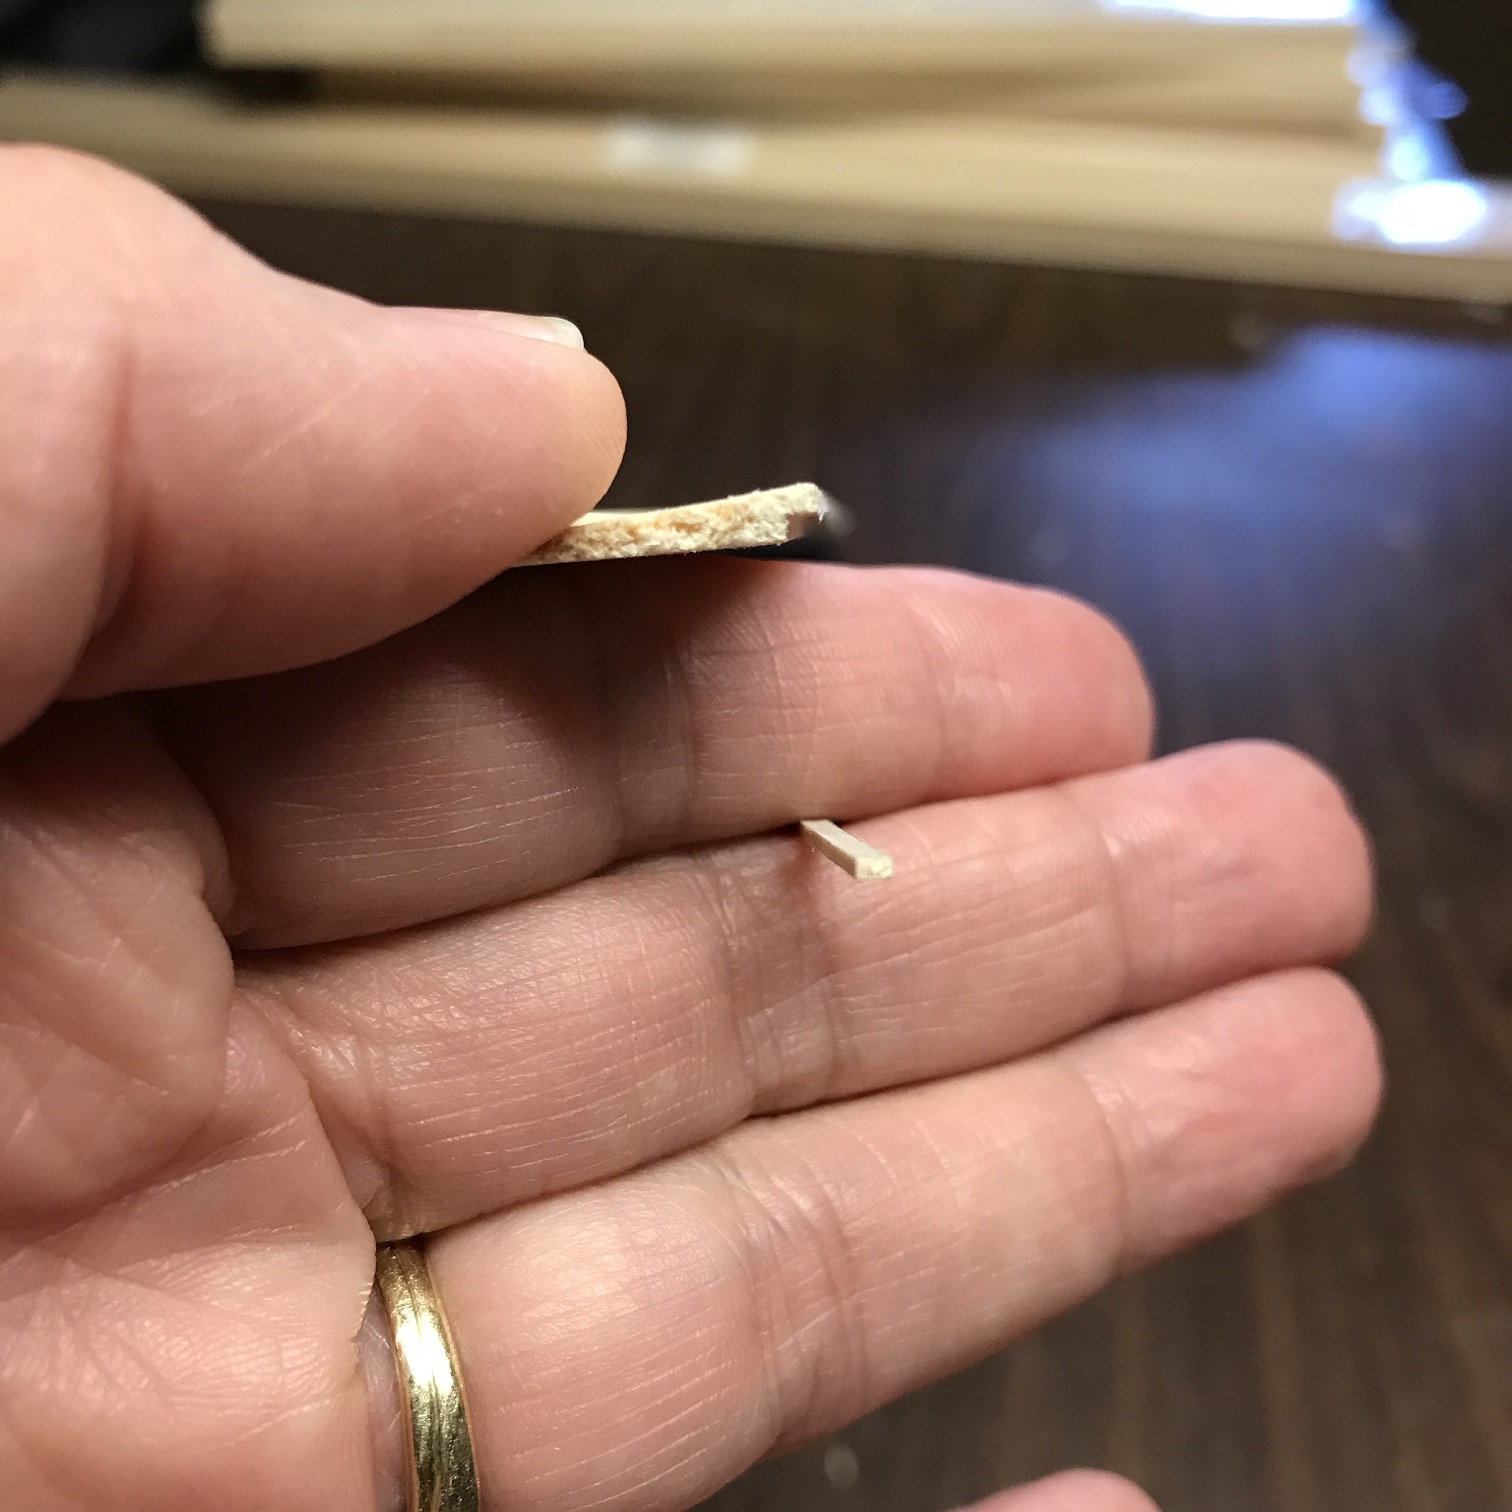
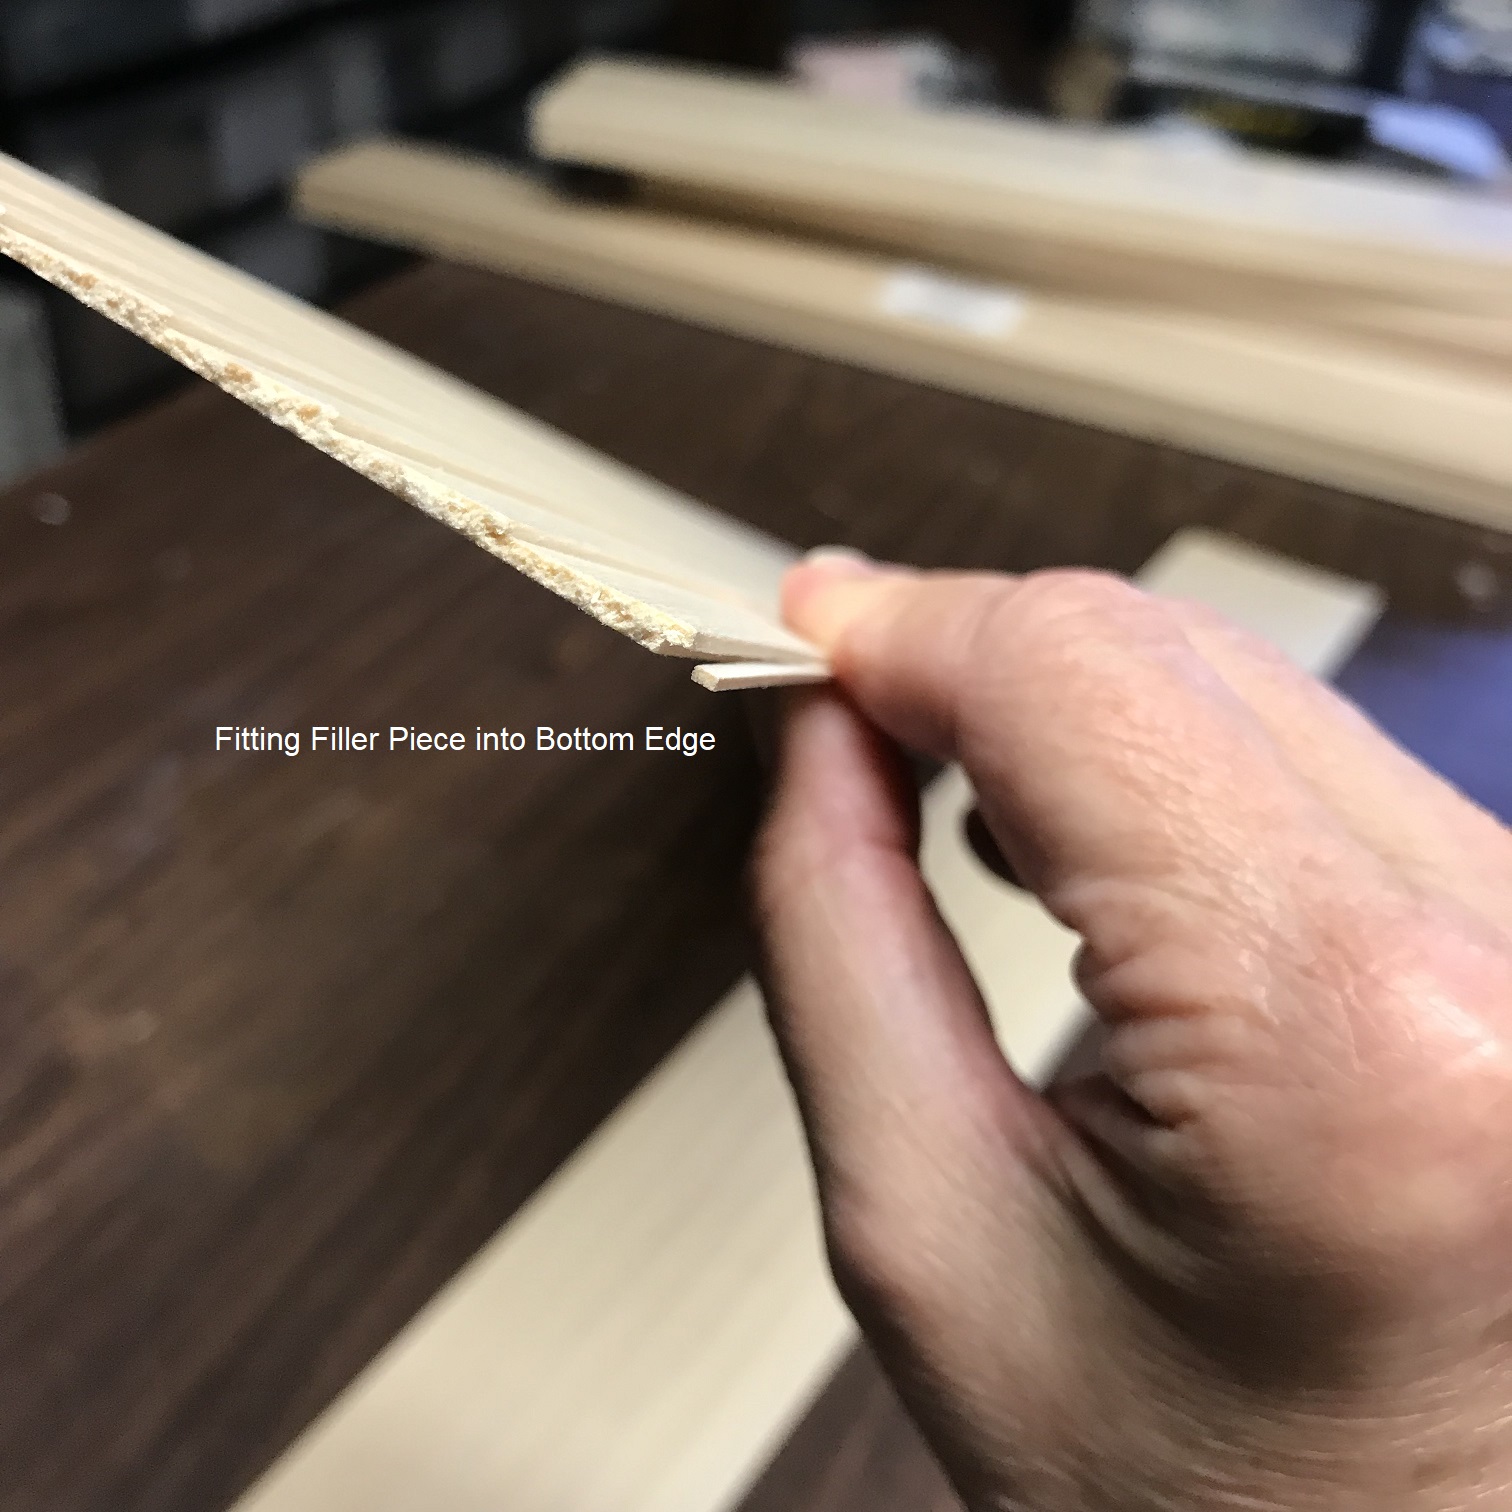
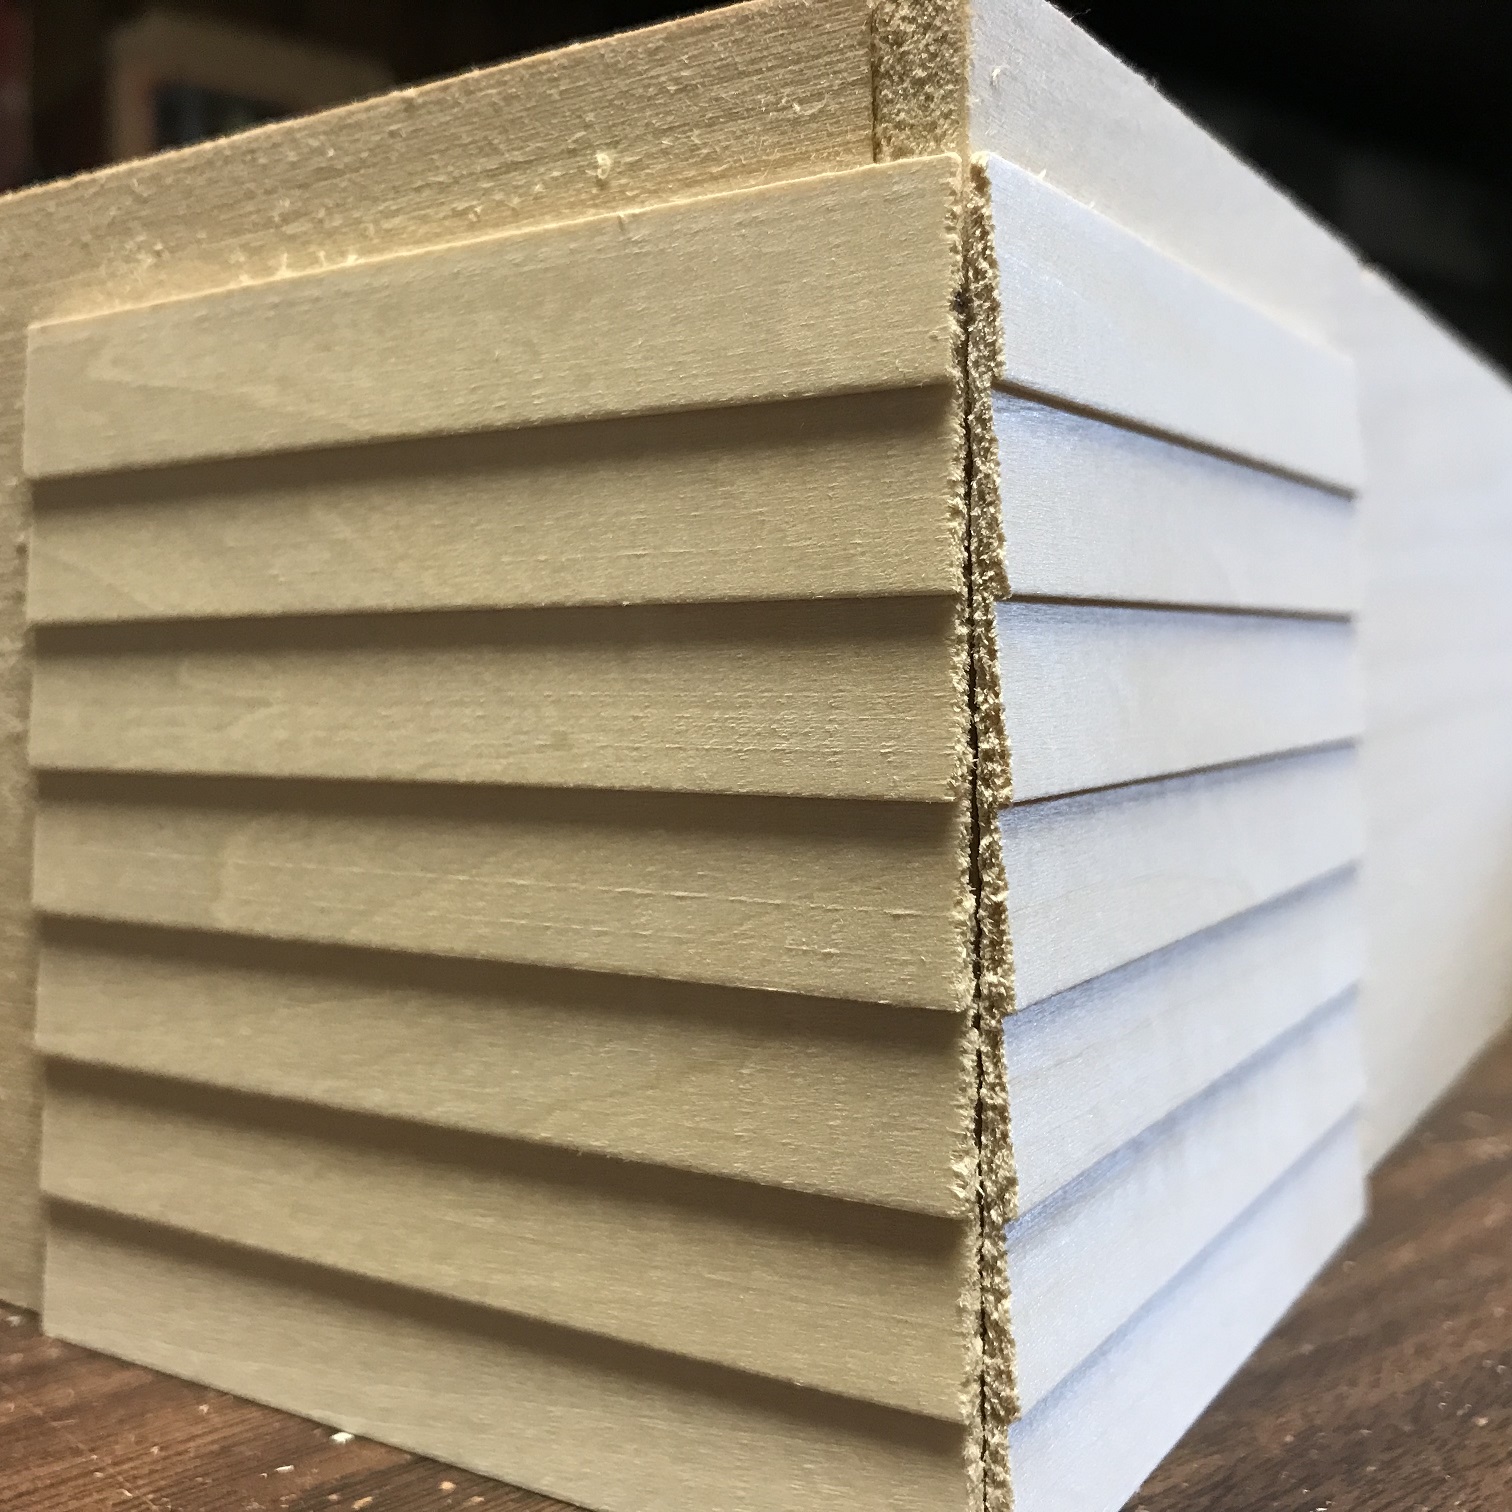
Each siding sheet usually has a recessed cut at the bottom edge that creates a small lip to sit over the siding sheet below. This lip makes a good joint and helps avoid (or diminish) the development of a visible crack or gap should the siding pieces shrink at some point. A word of caution regarding the lip: do not allow glue to extend above the top edge or below the bottom edge of the siding sheets. This excess glue will prohibit a good clean connection between the adjoining sheets. Since the siding installation should be started at the bottom edge of the dollhouse, the recess on the very bottom piece should be filled with a piece of square stripwood, such as MW4022, making the bottom edge less vulnerable to damage. See images below.
When installing siding sheets on your dollhouse, do not butt sheets end-to-end, rather make certain you have several sheets on hand that are longer than your dollhouse is wide so you can avoid very unrealistic and noticeable "seams." It is preferable to install siding sheets from end to end of the dollhouse (then cut out doors and windows), however, you can also place sheets between doors and windows to avoid any seams. Hold (or temporarily tape) your siding sheet in place then using a pencil mark any doors and windows (from inside the dollhouse) to indicate your cutting lines. Remove the sheet and cut along the pencil lines with your knife. It is usually easier to first cut along the vertical lines then across the horizontal lines. This is especially true when a siding sheet covers only part of the door or window (usually top or bottom). Always test fit to confirm that your doors and window frames are easily inserted into place before attaching the siding. TIP: If your doors and windows are already installed, try to gently remove them to make it easier to install your siding sheets. Usually, with a little pressure, a metal putty knife, and a hair dryer to heat the putty knife and glue used on the doors and windows, they should come away from the dollhouse. If that is not an option, you will need to be more diligent when cutting the siding sheets to fit around the frames.
While there is no right or wrong way to cut and install the siding sheets, some prefer cutting and numbering all sheets then installing them bottom to top. Others prefer cutting and installing a few sheets at a time. The second option is more likely to avoid confusion and errors. We recommend cutting pieces fairly accurate but most shortfalls can be covered with door or window casing and edge trims.
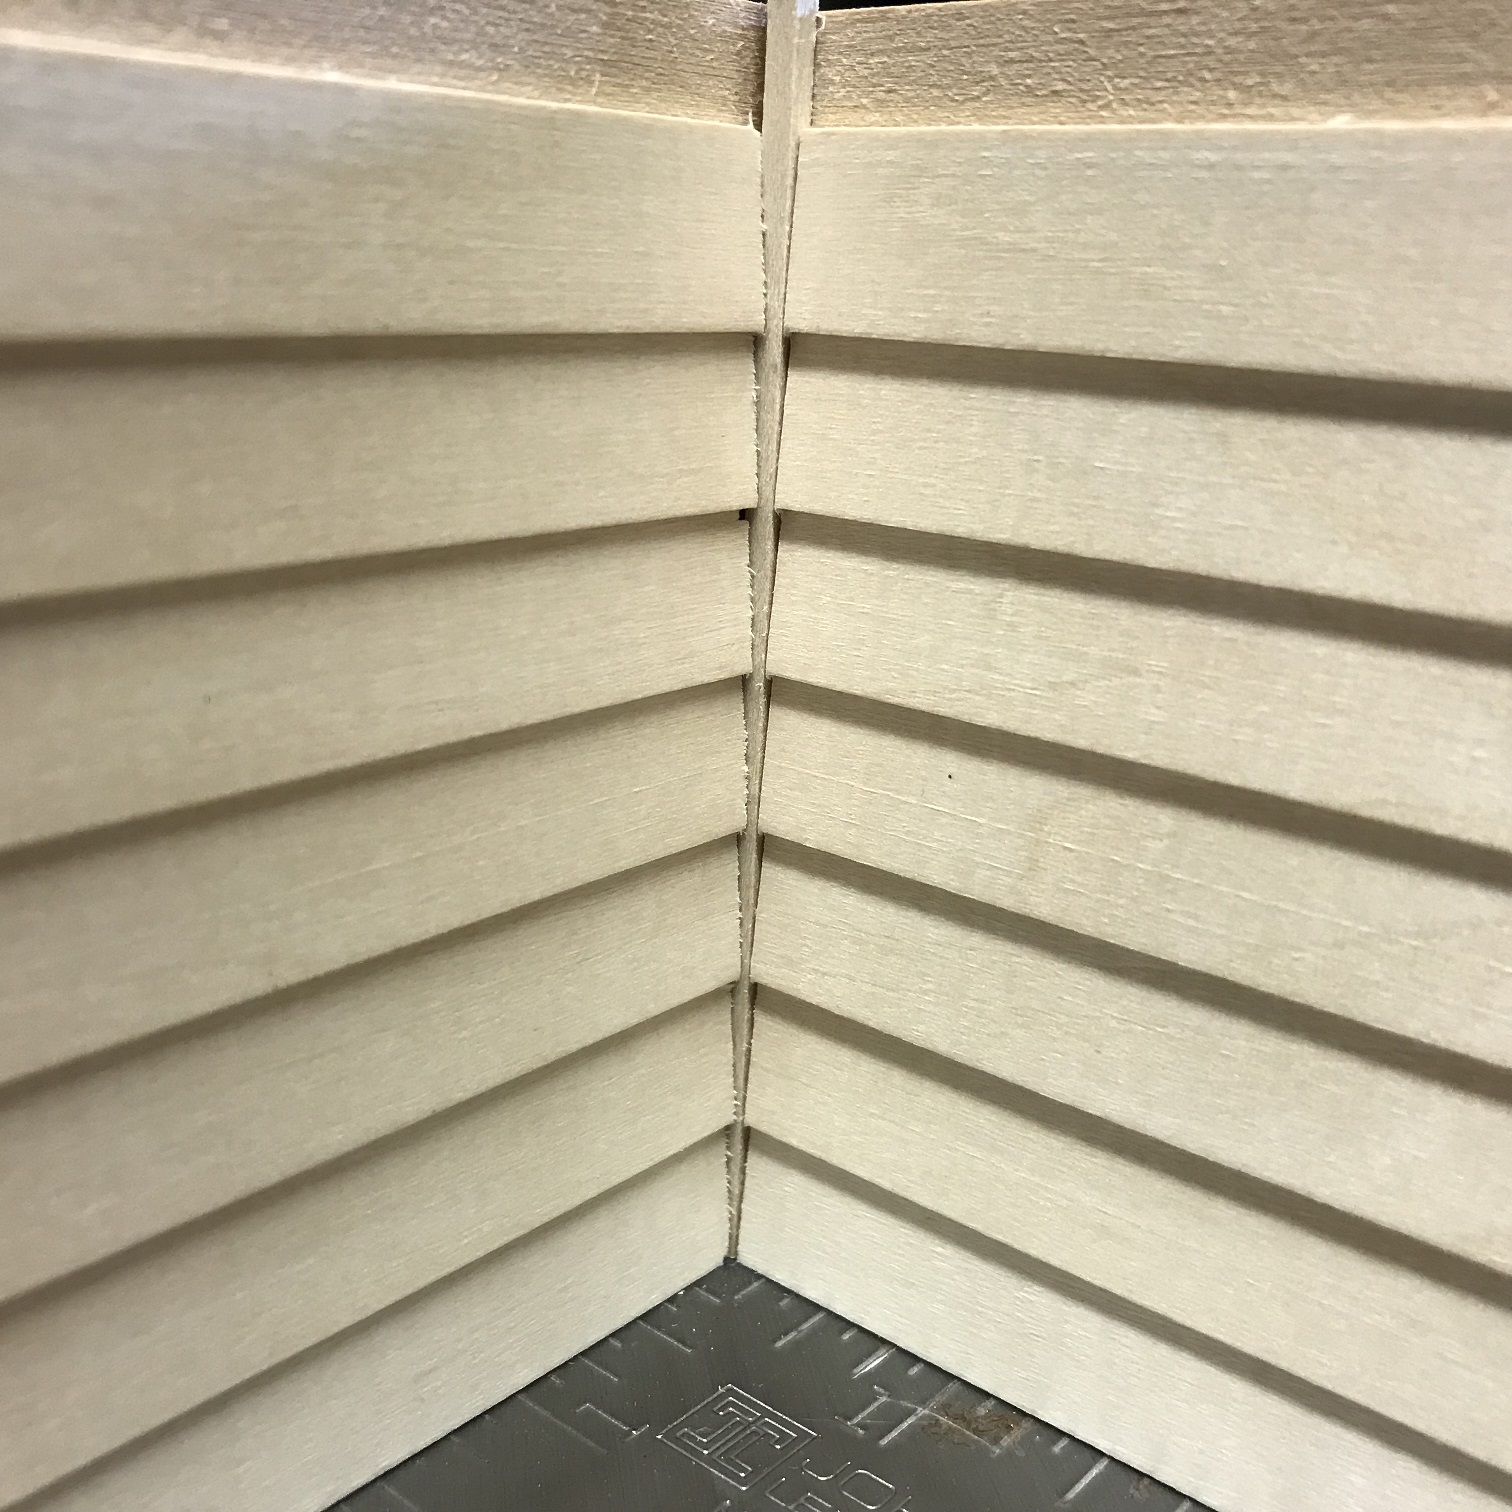
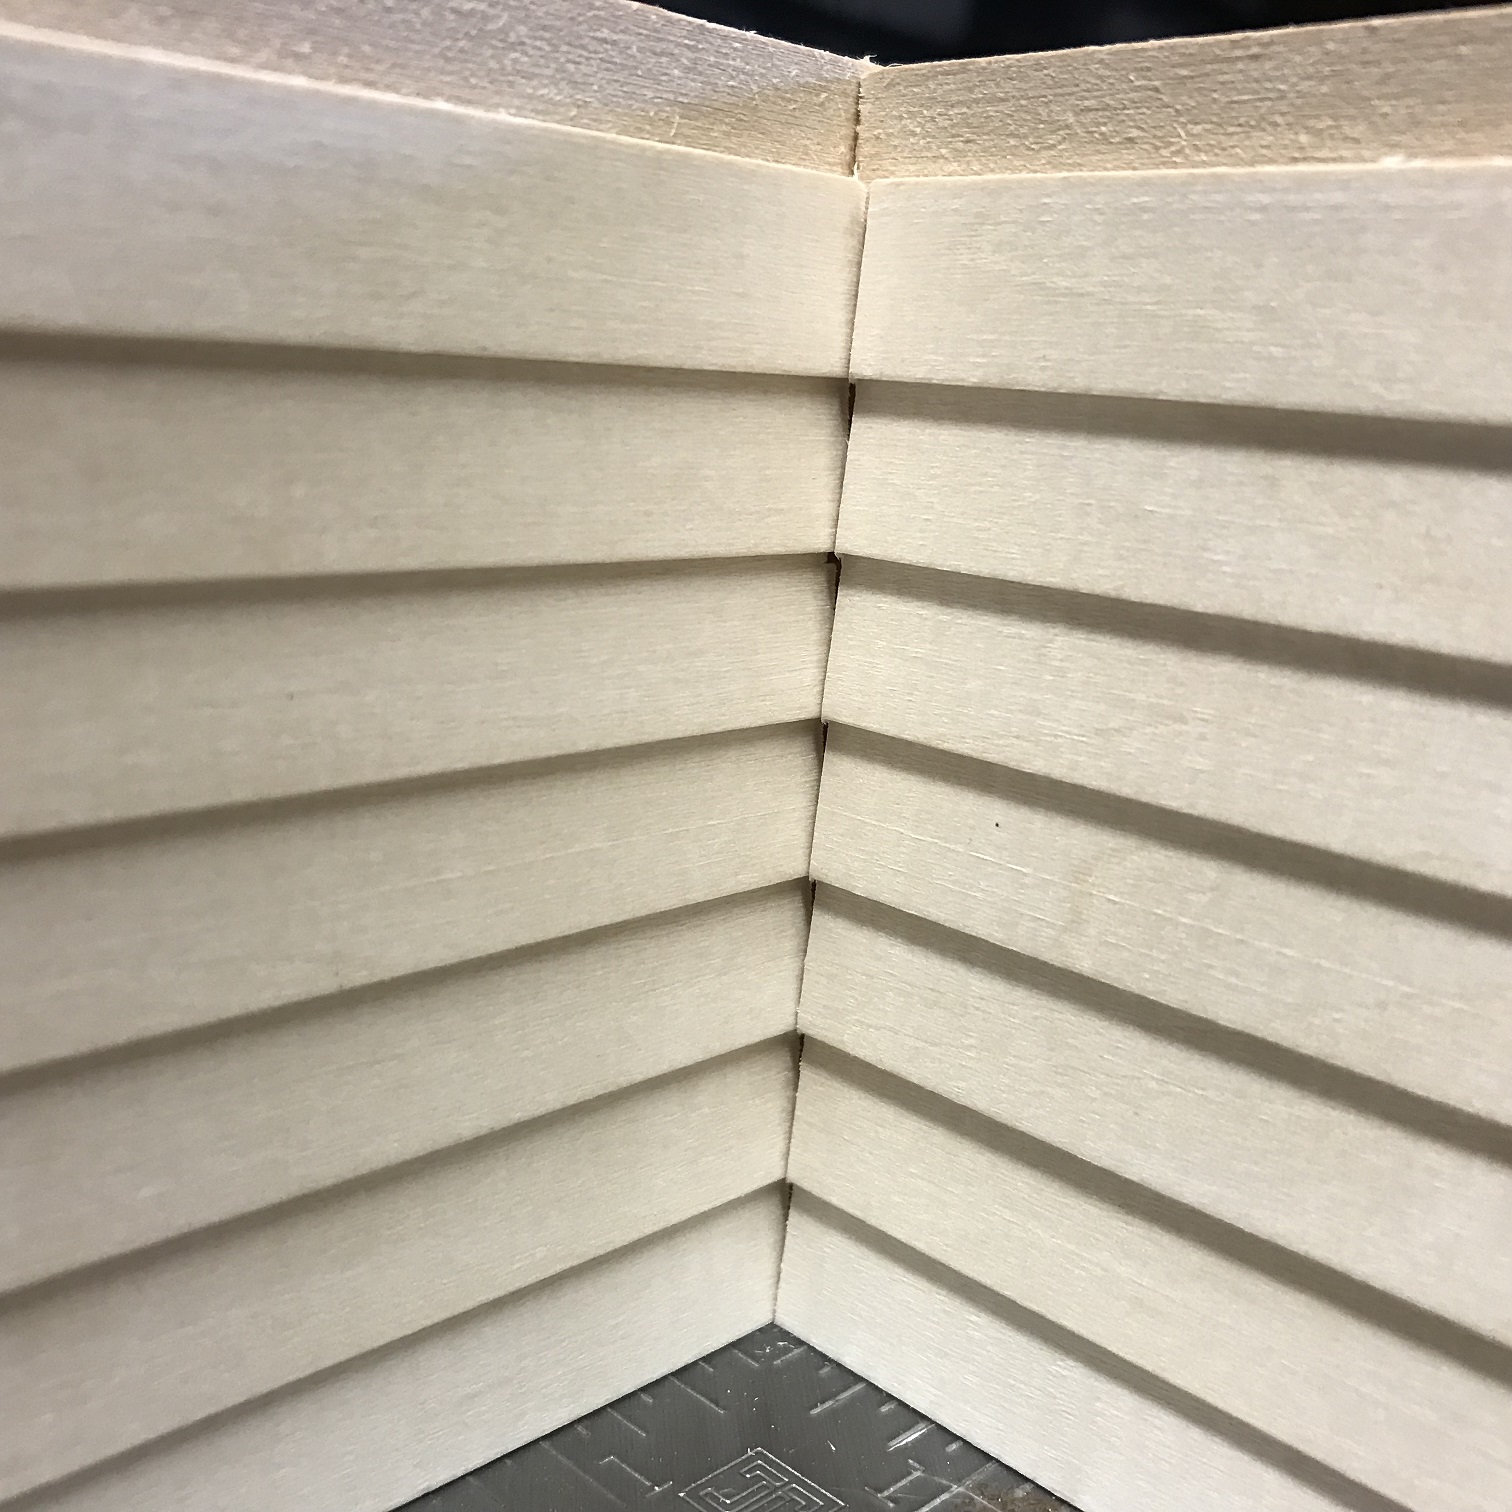
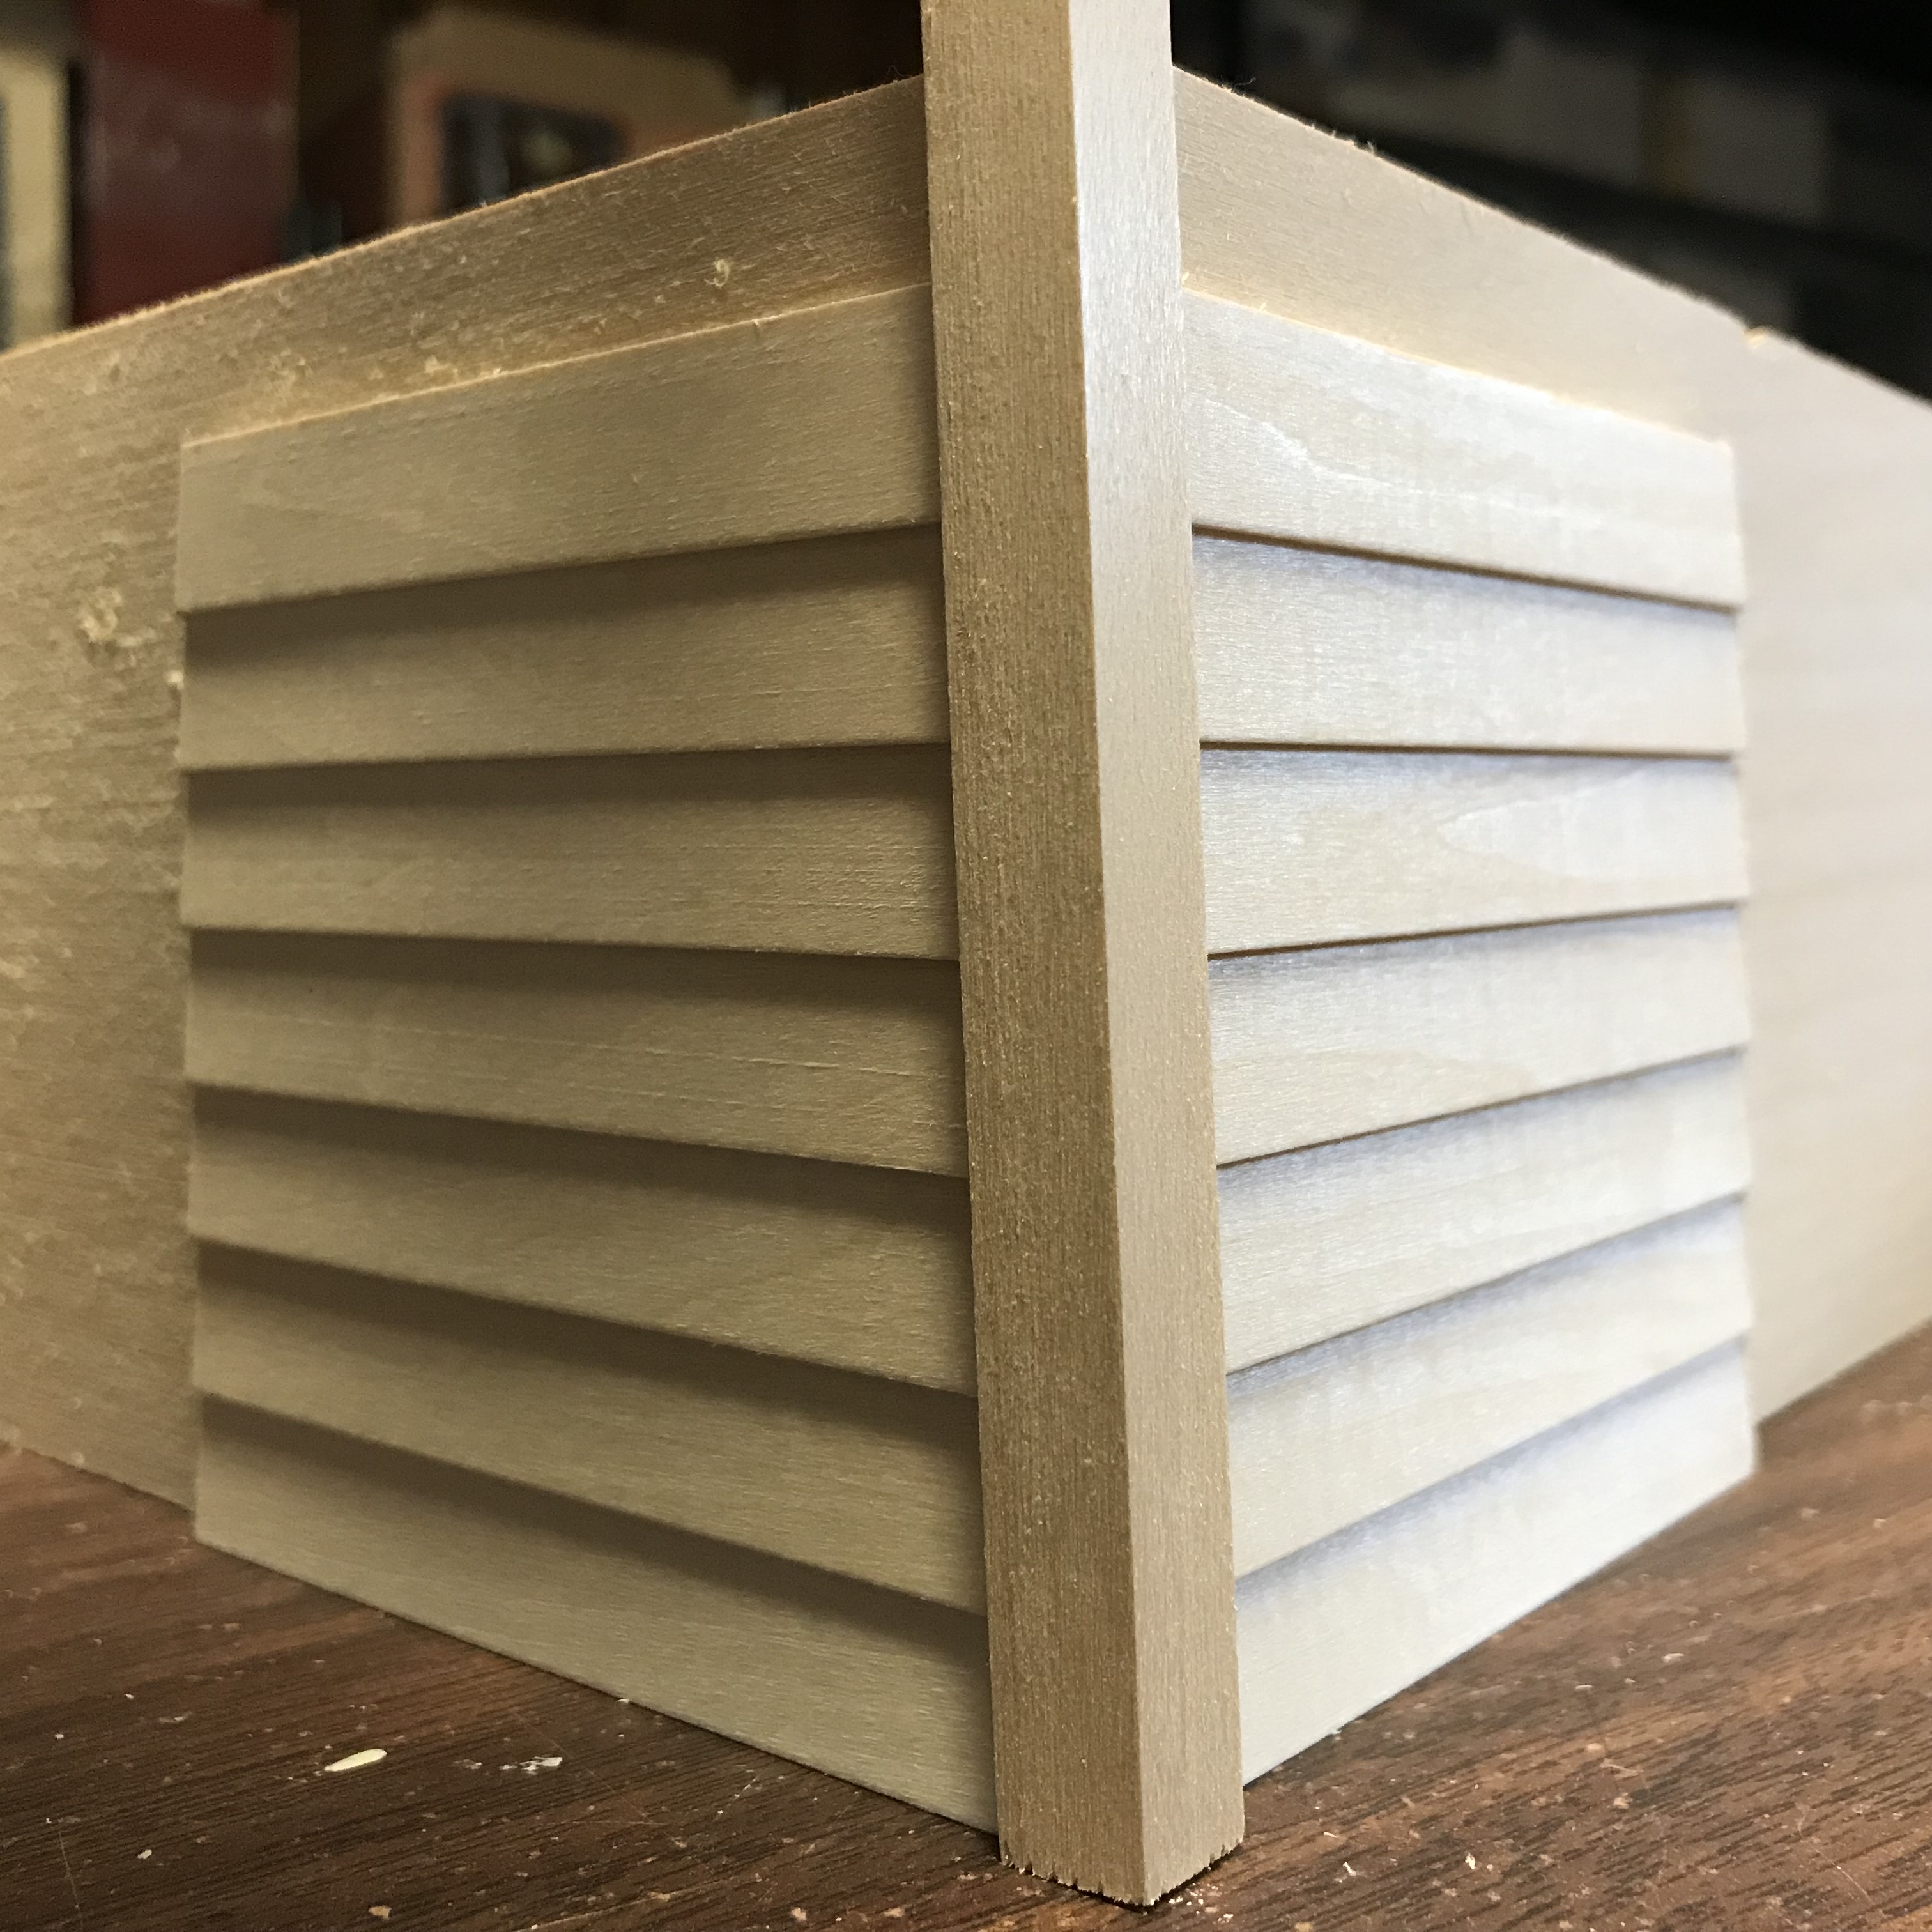
The exception would be inside corners such as an "L" shaped house or one with extensions where siding edges meet. The siding may be simply butted together, or a 1/8" x 1/8" stripwood may be placed in the inside corner to receive the butt ends of siding from both walls, as is commonly done on real houses. The stripwood makes a clean joining and also helps to hide any mismatch of siding. This particular trim at inside corners is painted the same color as the siding while other trim boards are usually a contrasting color. Typically, exterior corners are covered with angle trims for a finished look.
TIP: Cutting the sheets may be done with various saws, a utility or a hobby-craft knife. When using a knife several passes (scoring) are made for each cut rather than trying to cut through with the first cut.
When siding must be cut on an angle, such as under the roof at the gable ends or on dormers, create a template of the area from scrap material (or paper) and transfer the outline onto your siding sheet. Remember, any rough edges can be covered with trim stock for a finished look. If your dollhouse has an attached porch you may need to trim off some of the bottom of the siding sheet, so plan according. It may not be the best place to install your first sheet of siding.
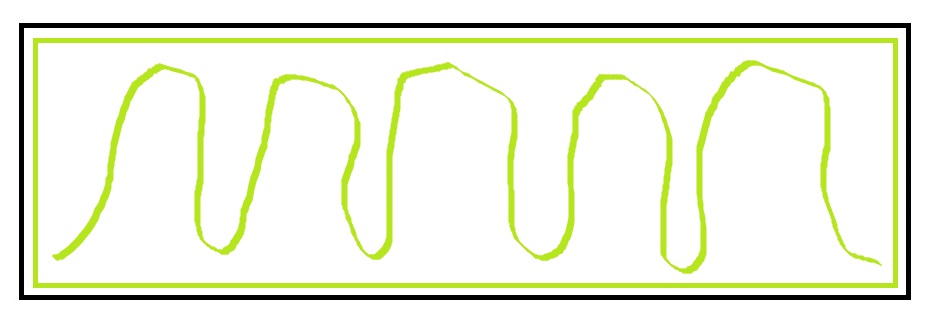
When you are ready to glue the siding sheets in place remember to use a non-water base adhesive. Water based glues will most likely cause the siding to warp. Consider Quick Grip, Multi-Grip, or MagnaTac for this purpose. You can find all these glues here if you wish to compare them. These are all solvent based adhesives and are very good for attaching siding to plywood. Apply a bead of glue along all of the edges plus a zig-zag bead in the middle (see illustration at left). After positioning the siding, lift the sheet slightly to allow air to reach the flattened glue on both surfaces then press the siding sheet back into place. While the adhesives grip quickly and permanently, you may notice the need to press and hold the sheet for a couple minutes to help it keep good, tight contact with the plywood. Some installers actually allow the solvent based adhesives the dry a bit (until when touched no glue strings pull from either the siding or the plywood) then press in place and firmly rub along the siding until flat and tight. If this is your first installation, you might consider testing on scrap wood before proceeding.
A major point of discussion when installing sheet siding is when and how to paint the siding. As in most projects, you will get several different answers, or opinions. But the majority of dollhouse builders who have worked with pre-milled siding sheets agree that it is best to paint after the siding has been properly installed. Some will argue that the siding sheets will warp if not painted on both sides before installation, but most agree that with the proper application and adequate adhesive, the sheets will not warp. The key is to be generous with your glue, making certain that all edges are firmly attached, that you have a fair amount of adhesive spread across the main body of each sheet, and that you have used a non-water base adhesive (solvent base only).
When painting your dollhouse be certain to apply 2-3 thin coats (beginning with a latex primer/sealer base). Remember thin coats so you do not lose definition. Lightly sand each course of siding following the direction of the laps between each coat. Consider using an emery board or finishing grit sandpaper that you have folded in half for ease of holding and sanding along the laps. Avoid sanding against the grain or again you will lose the definition of the siding.